
Cabinet Refinishing – Give Your Cabinets a Fresh Look
Cabinet Refinishing San Jose CA can give cabinets a new lease on life by giving them a fresh coat of paint. Refinishing can also help with issues like warped doors that may occur due to changes in temperature or humidity.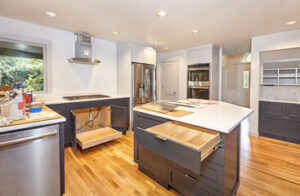
However, refinishing is time-consuming and expensive. It can also create a mess that is hard to clean up.
Cabinet refinishing is an inexpensive way to update your kitchen. It can be done on painted or wood cabinets and is less expensive than replacing them with new ones. Refinishing involves stripping the old finish and sanding down the cabinets. It is a labor-intensive project and can take three to five days. It’s important to choose a quality paint that will last longer and protect the surface from chipping and peeling. Many pros offer free design consultations, which can help homeowners find the best new look for their cabinets.
Cabinets can be stained in a variety of colors, such as mahogany or cherry, and can be finished with a satin or semi-gloss finish. Most professionals recommend using a polyurethane top coat to protect the finish from moisture and food spills. Stain covers 150 to 300 square feet of cabinetry per gallon, and the number of coats required depends on how dark you want the stain to be.
Most home improvement stores sell sandpaper in various grits, primer, and paint, which are needed for this type of work. Some cabinet painters even offer additional services, such as adding decorative molding or changing the hardware on your doors and drawers. These extras may add to the cost of refinishing, but can be worthwhile in terms of the long-term value of your home.
When hiring a professional to refinish your cabinets, be sure to ask them to quote the total price of the job. This will include labor costs, sanding, and cleaning up the work area. It’s also a good idea to ask your pro to give you an estimate on how much stain or paint will cover your cabinets.
If you’re considering refinishing your cabinets, it’s a good idea to get quotes from several professionals. You can also save money by bundling your cabinet painting projects with other remodeling tasks, such as repainting the walls or updating the doorknobs.
Another option to consider is cabinet refacing, which replaces the doors and drawer fronts while keeping the existing cabinet boxes. This is a more labor-intensive project than refinishing, but it’s significantly cheaper than buying and installing new cabinets.
Time
If your cabinets are starting to show signs of age, it may be time to consider a cabinet facelift. However, the first thing to do is examine the condition of your cabinetry and decide if it is worth the investment. For example, if the cabinets have extensive damage such as delaminating, sagging, or breaking, it will be better to replace them rather than refinishing them. Painting over these damages will only cover them up and the problems will resurface sooner or later.
Refinishing your cabinets will require some level of skill and patience. It is recommended that you hire a professional to do the work. A professional will also have access to tools and supplies that you might not, making the job much easier. They will be able to prepare your cabinets for painting by sanding and priming them. They will also be able to use a paint that resists dirt, grime, and chipping. This type of finish will last much longer than standard paint.
In addition to the time needed for sanding and priming, you’ll need to allow time for drying and curing. This can take several days, especially if the cabinets are being sprayed with lacquer. The process can be messy and requires a large amount of ventilation. The chemicals in the spray can also irritate your skin and eyes.
A cabinet refinishing project will also require time for cleaning and cleanup. It is important to protect the surrounding areas by covering your countertops, floors, and appliances. You should also wear gloves and eye protection when using wood cleaner. In addition, you should spread drop cloths around the workspace to prevent accidental splatters.
It takes an average of three to four days to finish the cabinet refinishing process, including a day for setting up and masking. The cabinet refinishing process involves spraying the cabinets with solvent-borne lacquer, which creates volatile fumes that can remain in the air for a day or more.
While cabinet refacing is more expensive than refinishing, it will cost significantly less than replacing the entire set of cabinets. Moreover, it will save you time and energy.
Preparation
Cabinet refinishing is an affordable way to give your kitchen a fresh, updated look. However, it requires careful planning and execution to achieve the best results. If you’re not prepared for the time commitment and effort required to refinish your cabinets, consider alternative options. One option is to hire a professional company that can take care of the whole process for you. They can even help you choose the right color and sheen level for your cabinets.
The first step in the refinishing process is to sand the cabinets down to make them smooth and ready for paint. If you skip this step, the new finish will not adhere properly, resulting in chipping and peeling. Before sanding, use a dust mask to protect your lungs and eyes from the dust particles. You should also apply a coat of primer to the wood before starting to prevent stain from bleeding through.
Once the wood is primed, you can start painting. It’s important to apply the paint in small sections at a time and use long strokes to cover all areas evenly. After each coat of paint, wait for 3-4 hours for it to dry. It is also helpful to use a mini roller in order to avoid brush marks.
After the last coat of paint dries, you should wipe down the cabinets with a clean cloth to remove any remaining dust particles and to ensure that the final result is as smooth and even as possible. It is also a good idea to apply a clear coat polyurethane sealant to the cabinets to create an extra layer of protection from dirt and moisture.
Before beginning the refinishing process, it is a good idea to test your products and techniques on scrap wood. This will help you to avoid wasting expensive materials and will allow you to get a feel for how the finished product will look. In addition, testing your finishes on scrap wood will save you the cost of a failed finishing project that has to be sanded down and redone.
The refinishing process can be challenging and time consuming, but it can also be rewarding. By following the steps listed above, you can get the most out of your kitchen remodeling project.
Finishing
Cabinet refinishing involves the process of hand sanding or chemically stripping existing cabinetry and then applying new paint or stain. Refinishing is a cost-effective and simple way to update the look of your kitchen without having to replace cabinets entirely. However, there are a few things to consider before refinishing your cabinets.
Before applying a new finish, it’s important to make sure that your cabinets are clean and free of dust and dirt. This will help them look better and last longer. It’s also a good idea to lightly sand the surface of your cabinets before you start. This will smooth out any rough areas and help the new finish adhere to it.
During the refinishing process, it’s best to work with professionals who have experience in this type of work. It takes a lot of time and patience to do a good job. A professional will know how to prepare the cabinetry for refinishing, which includes sanding and priming. In addition, they will be able to apply the finish quickly and correctly.
Refinishing can be tricky if your doors and drawer fronts are made of plastic or vinyl. If you have solid color or thermofoil cabinet doors, refinishing won’t be possible. These doors are usually made from medium-density fiberboard, and cannot be stained to look like wood. You could refinish the cabinet boxes and install new doors and drawer fronts, but they will not match the original style of your kitchen.
To give your cabinets a more dramatic look, you can apply a glaze to the cabinet door surfaces. This glaze will create shading, and can be applied in a variety of ways to achieve the look you want. To get the best results, choose a glaze color that coordinates with your countertops, backsplash, and floors. Then, wipe away the excess glaze with a cloth.
Once you’ve applied the finish, it’s a good idea to seal the surface with a clear sealant. This will protect the new finish from stains and spills. Make sure you use a polyurethane that is safe for children and pets, and has low odor.